Assets
Track customer devices, equipment, and computers throughout their service lifecycle
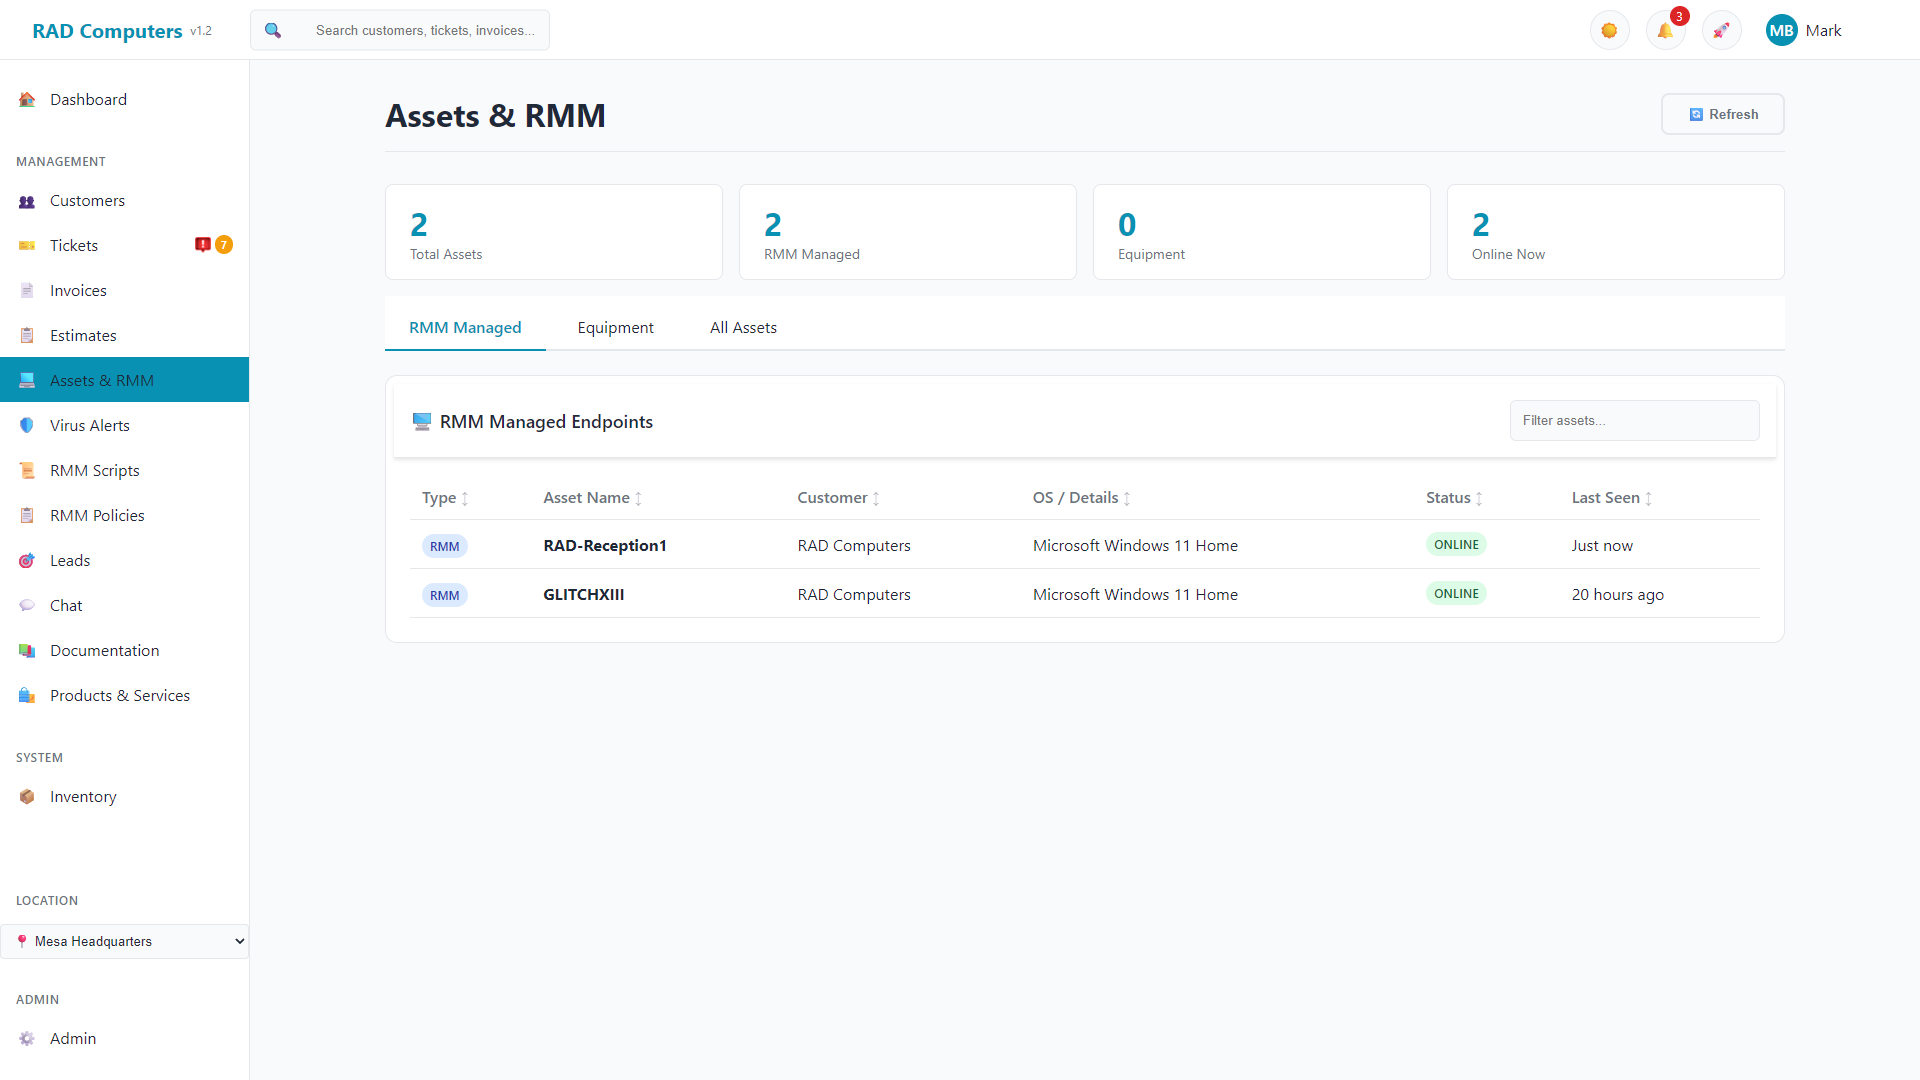
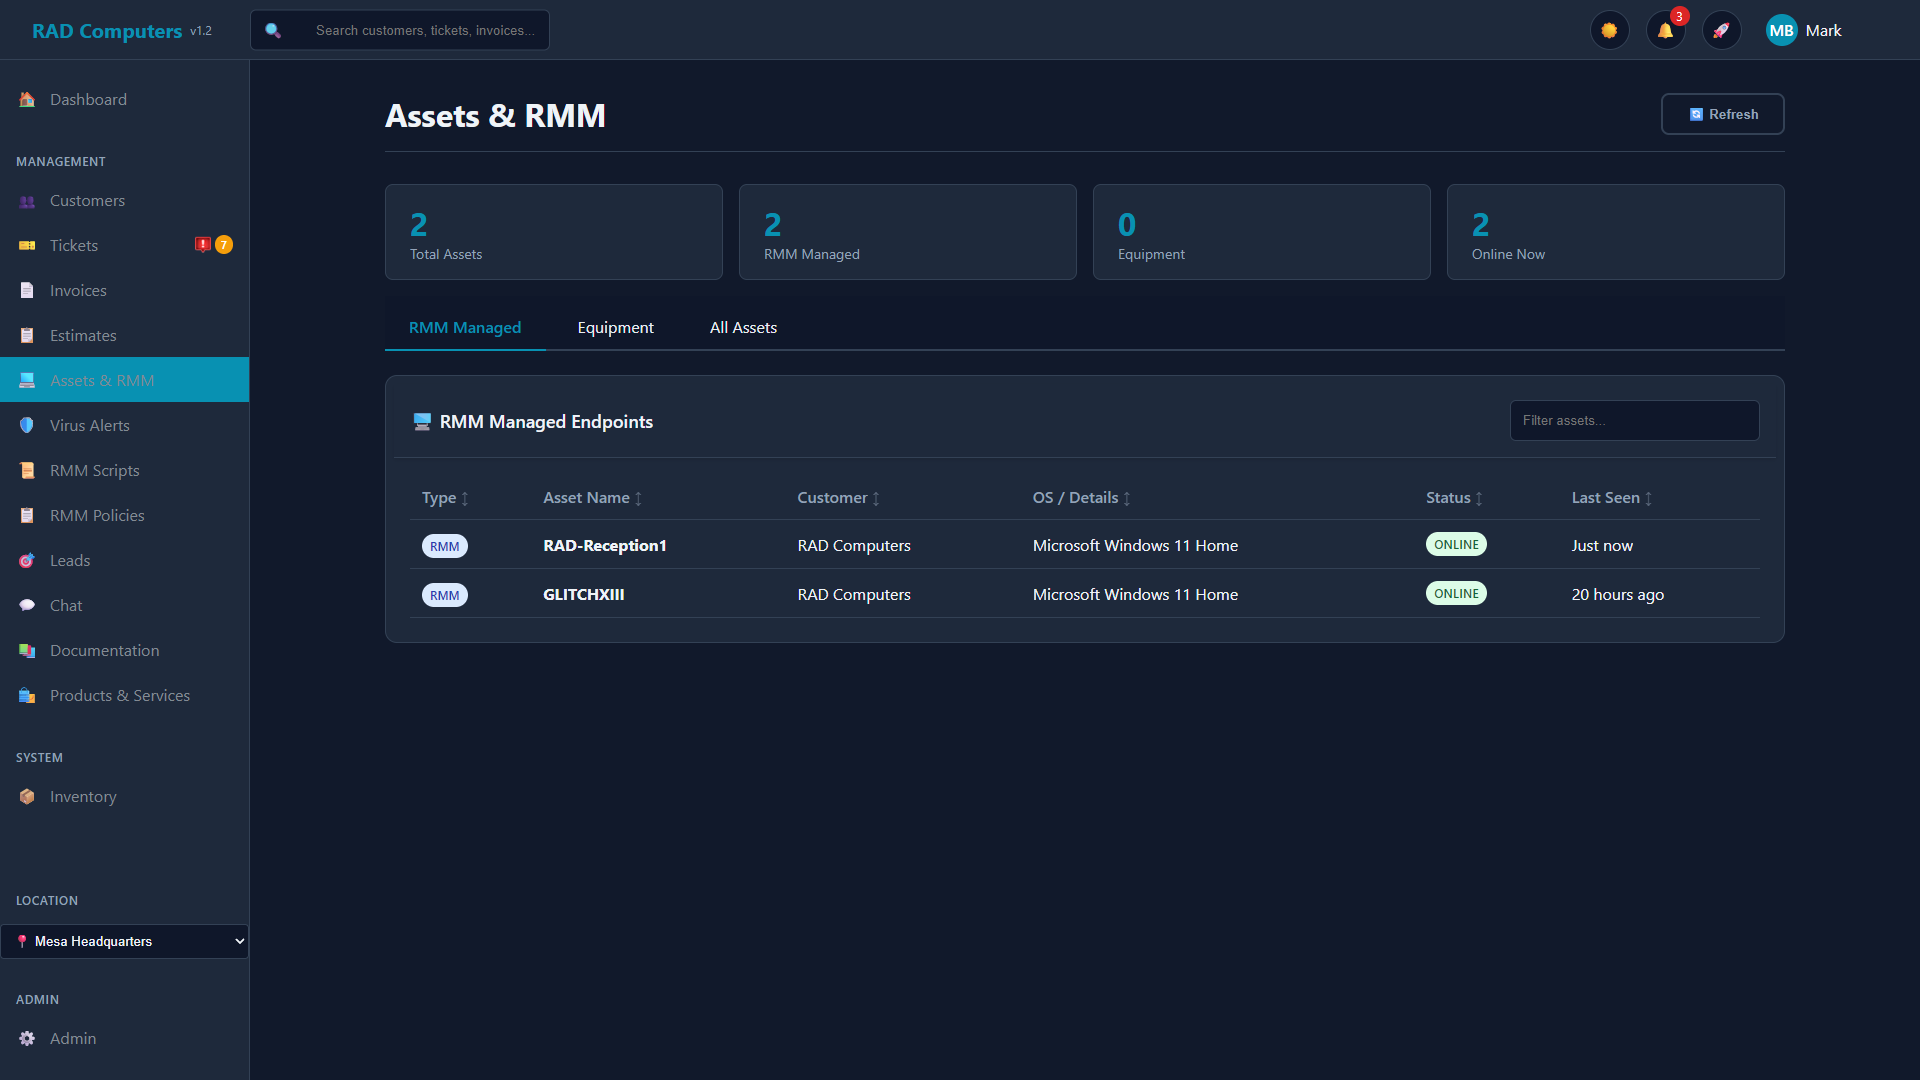
The Assets list showing all customer devices with status, owner, and quick actions
Overview
Assets in RAD Repairs represent the physical devices and equipment that belong to your customers. The Assets page provides a unified view of two types of assets: RMM-managed endpoints (computers with the monitoring agent installed) and customer equipment records.
Asset management helps you:
- View all RMM-monitored devices and their online/offline status
- Track customer equipment with make, model, and serial information
- See related tickets for each asset
- Access detailed hardware specifications for RMM-managed systems
- Run remote scripts and connect remotely via RustDesk or ScreenConnect for managed endpoints
- See cloud backup status at a glance for devices enrolled in Comet Backup

Device Tracking
View device information including manufacturer, model, serial number, and hardware specifications for RMM-managed systems.

Customer Linking
Assets are tied to customers, so you always know who owns what device and can quickly access their contact information.

Related Tickets
View tickets associated with each asset to understand the service history.

RMM Integration
Monitor managed devices with online/offline status, run remote scripts, and connect via RustDesk or ScreenConnect.
What is an Asset?
In RAD Repairs, there are two types of assets:
- RMM Assets - Computers with the RAD RMM agent installed. These provide real-time status, detailed hardware information, and remote management capabilities.
- Equipment Assets - Customer devices tracked manually in the system for service purposes. These store basic information like make, model, and serial number.
Asset Types
| Type | Badge Color | Information Available |
|---|---|---|
| RMM | Blue | Full hardware specs, OS info, CPU, RAM, storage, network, online status, alerts, remote access |
| Equipment | Purple | Device name, make, model, serial number, operating system, color, warranty status, notes |
Asset List View
The main Assets page displays all assets organized into tabs. The page includes summary statistics at the top showing Total Assets, RMM Managed count, Equipment count, and Online Now count.
Tabs
- RMM Managed - Shows only assets with the RMM agent installed (default view)
- Equipment - Shows only manually-tracked equipment assets
- All Assets - Shows both RMM and equipment assets combined
Available Actions
- Filter - Use the search box to filter assets by name, customer, or OS/details
- Sort - Click column headers to sort by type, name, customer, OS, status, or last seen
- Select - Use the checkboxes (RMM devices only) to select one or more endpoints for a bulk action
- View Details - Double-click an asset row to view its details
- Refresh - Click the Refresh button to reload asset data
The global search box at the top of the app also finds managed devices by hostname, friendly name, or serial number, alongside customers, tickets, and invoices.
List Columns
| Column | Description |
|---|---|
| Type | Badge showing "RMM" (blue) or "Equipment" (purple) |
| Asset Name | Hostname for RMM assets, device name for equipment |
| Customer | Owner of the asset (business name or customer name) |
| OS / Details | Operating system info for RMM, or make/model for equipment. May include serial number. |
| Status | Online (green), Offline (red), or Unknown (gray) - only meaningful for RMM assets |
| Last Seen | When the asset last reported in (for RMM) or was last updated (for equipment) |
Bulk Actions on Devices
You can act on many RMM endpoints at once without adding each device to a policy. Select the devices you want (for example, filter to one client, then tick the checkboxes or use the header "select all"), and a bulk action bar appears above the list.
Select devices
Filter or search to narrow the list, then check the boxes for the endpoints you want. Selection stays as you sort or filter. Only RMM-managed devices can be selected (equipment can't run scripts).
Choose an action
The bulk bar shows how many devices are selected and offers:
- Run Script - Pick any script from your library; it runs on every selected device. Devices that already have that script queued are skipped.
- Broadcast - Send a one-way informational message that pops up on each user's screen (see below).
- Reboot - Restart the selected devices. Each shows the user a 60-second warning to save their work before restarting.
Turn on Skip offline to only act on devices that are currently online; otherwise offline devices receive the command when they next reconnect.
Broadcast Messages
A broadcast pops an informational message on the selected devices, similar to the chat window but one-way - the user can read it but can't reply. It's ideal for mass announcements such as scheduled maintenance, outages, or reminders.
- Select the devices, click Broadcast, and enter an optional title and a message.
- Online devices show it immediately; offline devices show it when they reconnect.
- The message stays on the user's screen until they dismiss it.
- Every broadcast is logged (message, who sent it, target devices, and time) for your records.
Broadcasts and the on-screen reboot warning are shown by the device's tray app, so the endpoint must be running a recent agent and tray version. Agents update automatically.
Adding Assets
Assets are added to the system in different ways depending on the type:
RMM Assets (Automatic)
RMM assets are automatically added when the RMM agent is installed on a customer's computer. The agent registers with the system and begins reporting hardware information and status. See RMM & Monitoring for agent installation instructions.
Equipment Assets
Equipment assets are added when creating tickets - the device information you record at check-in is stored with the customer record and appears in the Equipment tab. If you only want to track RMM-managed devices, you can turn this off in Admin Settings → Ticket Management → Equipment Tracking (it's on by default). To remove an equipment record, open it on the Equipment tab and click Delete Equipment.
When an RMM agent is installed on a customer's computer, it automatically registers with your RAD Repairs instance and appears in the RMM Managed tab within minutes of first connection. If asset approval is enabled in RMM Settings, new devices wait in a pending state until approved.
Asset Information
The information available depends on whether the asset is RMM-managed or equipment.
RMM Asset Information (Automatically Collected)
RMM agents automatically collect and report detailed hardware information:
| Category | Information Available |
|---|---|
| System Information | Manufacturer, Model, Serial Number, Form Factor, Last User, Last Boot Time |
| Operating System | OS Name, Version, Build Number, Architecture, Install Date |
| Processor | CPU Name, Manufacturer, Core Count, Logical Processors, Max Clock Speed |
| Motherboard & BIOS | Motherboard Model, BIOS Version, BIOS Date |
| Memory | Total RAM, Individual RAM Stick Details (slot, size, speed, type) |
| Video Cards | GPU Name, VRAM Amount |
| Network | Local IP Address, Public IP Address |
| Storage | Physical Drives (type, size), Logical Drives (letter, size, free space, usage percentage) |
Equipment Asset Information (Manual Entry)
| Field | Description |
|---|---|
| Device Name | Descriptive name for the device |
| Make | Manufacturer (Dell, HP, Apple, etc.) |
| Model | Specific model name/number |
| Serial Number | Manufacturer serial number |
| Color | Device color |
| Operating System | OS if applicable |
| Warranty Status | Current warranty information |
| Notes | Additional notes about the device |
Customer Association
Every asset is linked to a customer. On the asset detail page, you can see:
- Customer name (clickable link to their profile)
- Customer email address
- Customer phone number with quick Call and SMS action buttons
Viewing Customer's Other Assets
When viewing an RMM asset detail page, a secondary sidebar shows all other managed systems belonging to the same customer. This makes it easy to navigate between a customer's devices.
Click on any system in the customer's managed systems sidebar to quickly switch to that asset's detail page without returning to the main list.
Related Tickets
The asset detail page displays a "Related Tickets" section in the right sidebar showing all tickets associated with this asset. For each ticket you can see:
- Ticket number
- Status badge (Open, In Progress, Waiting Parts, Waiting Customer, Resolved, Completed)
- Ticket subject/description
- Creation date
Click on any ticket to navigate directly to that ticket's detail page.
Viewing related tickets helps technicians understand the device's repair history before starting new work. This context can help identify recurring issues or previous repair attempts.
RMM Features for Managed Assets
RMM-managed assets provide extensive monitoring and management capabilities directly from the asset detail page.
Available RMM Features

Alerts & Monitoring
View system alerts categorized by severity (Critical, Warning, Info). Filter by status and severity, track occurrences, and page through history — the alert list is paginated (10 per page by default, selectable up to 100).

Remote Access
Connect to managed devices via RustDesk or ScreenConnect directly from the asset page (requires the corresponding App Center configuration).

Script Execution
Run scripts remotely on the asset. View script history with status, exit codes, and output.

Windows Defender
View Defender status including real-time protection, definition version, and last scan information.
RMM Plans
Each RMM asset is assigned to a maintenance plan level. Click "Change Plan" on the asset detail page to select from:
- Calling Card - Basic presence monitoring with contact info access
- Bronze - Entry-level monitoring for light computer users
- Silver - Full monitoring for regular computer users
- Gold - Premium monitoring and management for power users
Plan tiers can be given custom display names in Admin Settings, and plan pricing feeds automatic recurring-invoice billing for managed devices.
Asset Actions
From the RMM asset detail page, you can:
- Install RustDesk / RustDesk - Deploy the RustDesk client to the device (preconfigured for your server via RustDesk's official deployment script). Once the device reports its ID, the button becomes RustDesk: clicking it launches your local RustDesk client and copies the machine's unattended-access password to your clipboard - paste it at the prompt and check "Remember password" for one-click access from then on (requires RustDesk configured in the App Center)
- Install ScreenConnect / ScreenConnect - Deploy the ScreenConnect access agent to the device, then join that device's session directly - your Host page opens and auto-launches the connection (if ScreenConnect is configured in the App Center)
- Install Backup - Retry deploying the Comet Backup client if this asset's customer opted into cloud backup but the client isn't installed yet
- Create Ticket - Start a new ticket for this device with the customer prefilled and this managed endpoint pre-selected, so the device details (make, model, OS, serial number) auto-fill from its inventory
- Run Script - Execute a script from your script library on this asset
- Change Plan - Modify the asset's RMM plan level
- Reassign Customer - Move the asset to a different customer without reinstalling the agent (see below)
- Uninstall Agent - Send a remote uninstall command that removes the RMM agent and the RMM Monitor tray app (including its startup entry), cleanly and completely
Reassigning an Asset to Another Customer
If a device ends up under the wrong customer — or genuinely changes hands (a business sells a machine, a family member takes over a PC) — click Reassign Customer on the asset detail page, search for the new customer, and confirm. Owner or admin role is required.
- The asset and its full monitoring history (metrics, alerts, script runs, software inventory, patches) move to the new customer
- No reinstall is needed — the installed agent keeps checking in as before
- RMM billing follows the asset: it is removed from the old customer's recurring RMM invoice and added to the new customer's
- Existing tickets stay with the customer they were created for
RustDesk requires your server config string in the App Center and the RustDesk client installed (not run portable) on your technician workstation. ScreenConnect requires your ScreenConnect instance URL in the App Center. If either tool is later uninstalled from a device outside of RAD Repairs, the button resets to its "Install" state automatically after the next hourly inventory sync. See RMM & Monitoring for setup details.
Cloud Backup Status
For customers who opted into cloud backup when their installer was created, each enrolled asset shows a backup badge in the page header: Backup OK (with the last backup date), Backup FAILED, or opted in (not installed). Backup status refreshes automatically every 30 minutes. See RMM & Monitoring for how Comet Backup works.
Asset Detail View
There are two different detail views depending on the asset type:
RMM Asset Detail Page
Double-clicking an RMM asset opens a full detail page with comprehensive information:
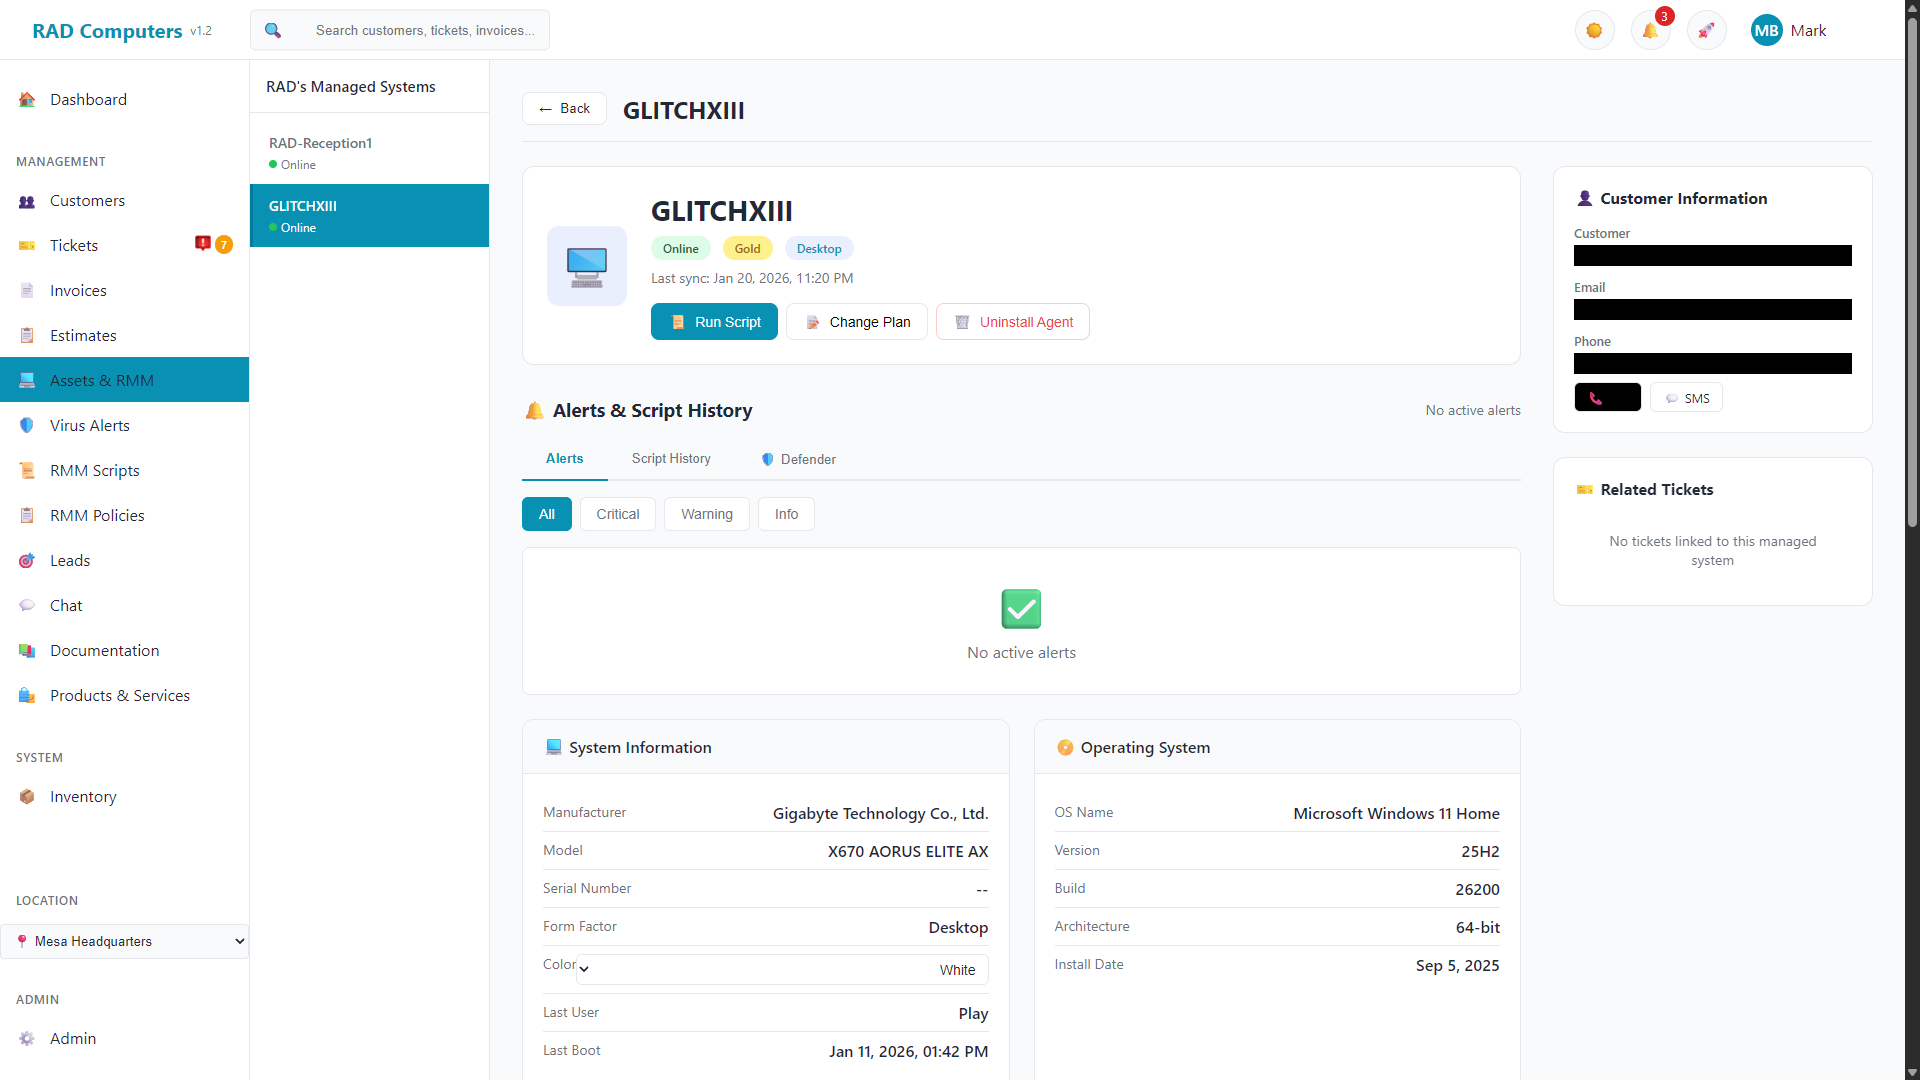
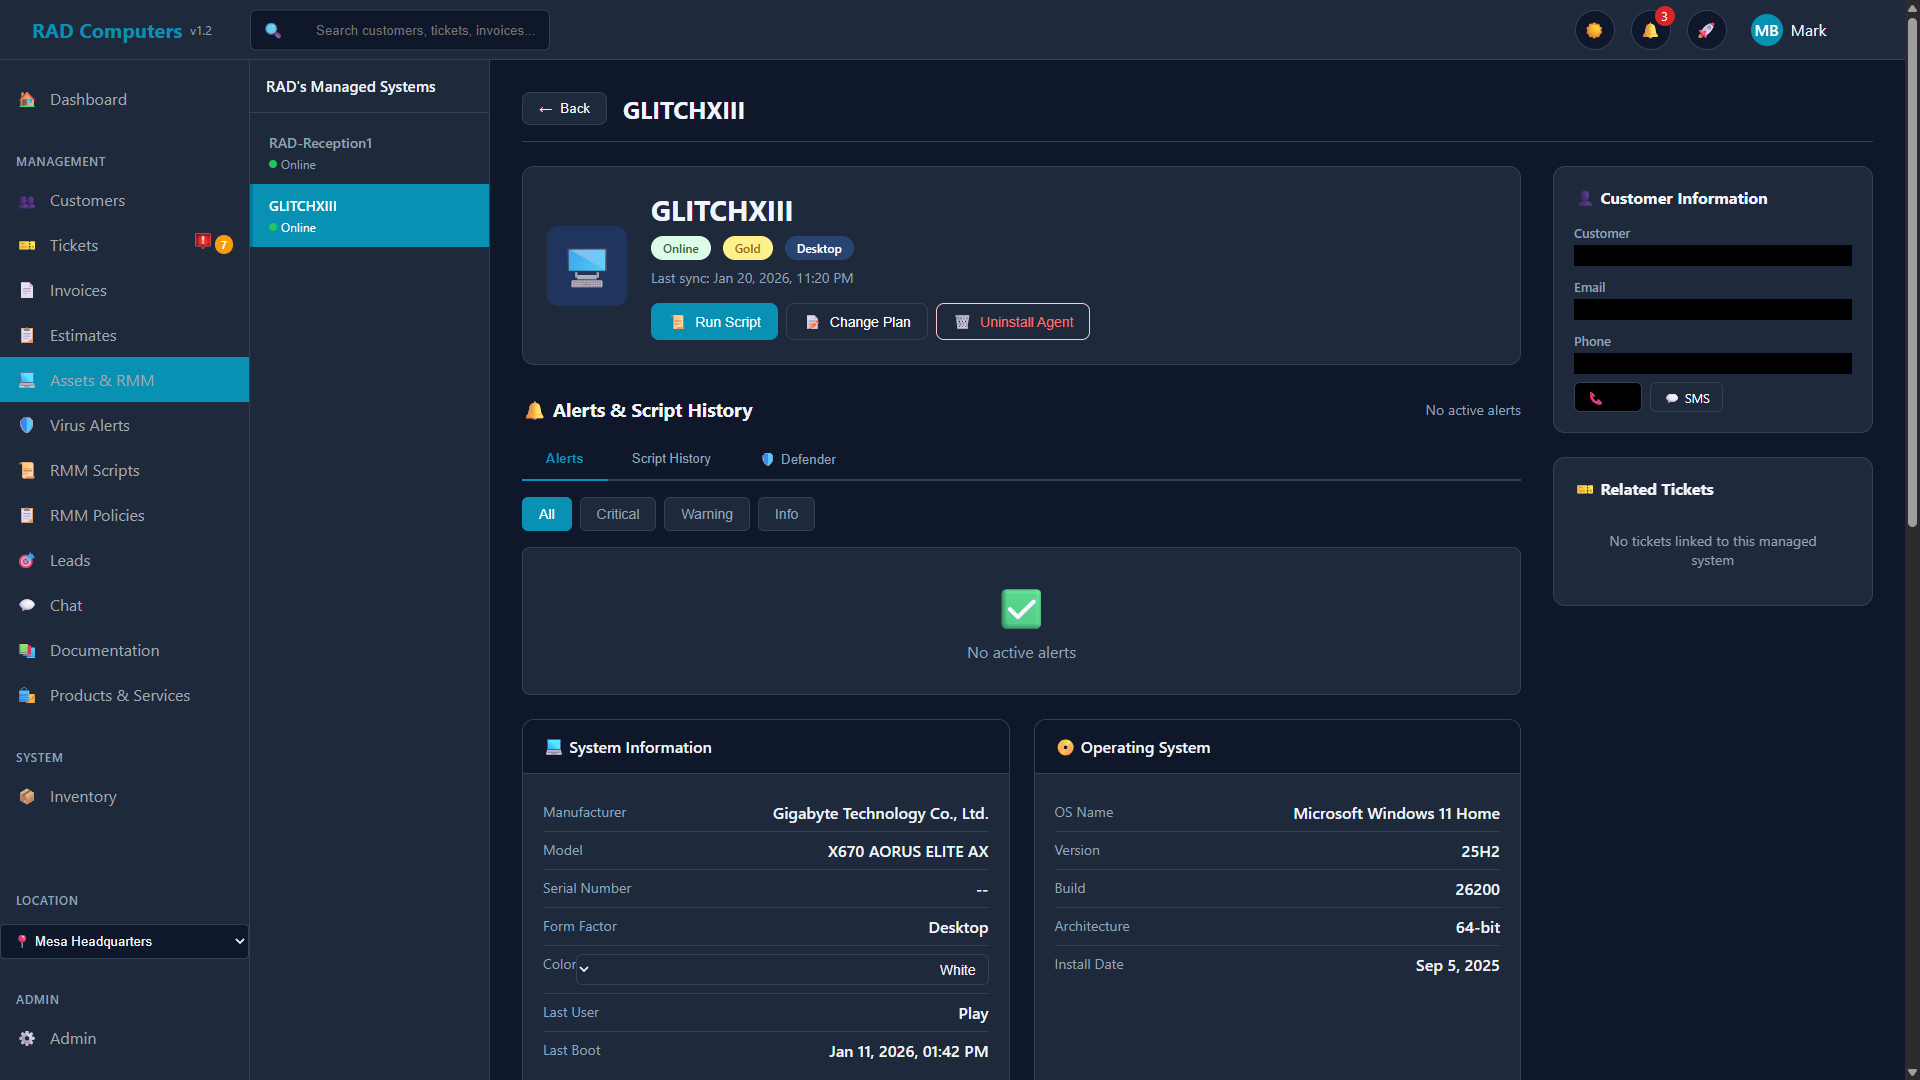
The RMM Asset detail page with hardware specifications, alerts, and management actions
Page Layout
| Section | Contents |
|---|---|
| Header | Hostname, status badge (Online/Offline), plan badge, backup status badge (for backup-enrolled assets), form factor, last sync time, and action buttons. A device shows Online while its agent is checking in (every 5 minutes) and is automatically marked Offline within about 12 minutes of going silent — even if it lost power or network without shutting down cleanly |
| Secondary Sidebar | Customer's other managed systems for quick navigation |
| Alerts & Script History | Tabbed section with Alerts, Script History, Windows Defender status, Software (searchable installed-software inventory with version, publisher, and install date), and Updates (pending Windows updates sorted by severity) — the inventory tabs refresh hourly from the agent. The Alerts tab is paginated — 10 per page by default, selectable up to 100 — with status (Active/Acknowledged/Resolved/All History) and severity filters |
| System Information | Manufacturer, model, serial, form factor, color selector, last user, last boot |
| Operating System | OS name, version, build, architecture, install date |
| Hardware Cards | Processor, Motherboard & BIOS, Memory, Video Cards, Network, Storage |
| Right Sidebar | Customer information with contact details and Related Tickets list |
The asset detail page is fully responsive. On a phone the columns stack into a single scrollable view, action buttons wrap to fit, and the tabbed sections scroll horizontally — so you can check a device's alerts, run a script, or start a remote session from the field.
Equipment Asset Modal
Double-clicking an Equipment asset opens a modal dialog showing:
- Device Name
- Customer
- Make and Model
- Serial Number
- Color
- Operating System
- Warranty Status
- Notes (if any)
- Last Updated timestamp
Frequently Asked Questions
How do I add RMM monitoring to a customer's computer?
Install the RAD RMM agent on the customer's computer. The agent will automatically register with your system, and the asset will appear in the RMM Managed tab. See RMM & Monitoring for agent installation instructions.
Can one customer have multiple assets?
Yes, there's no limit to the number of assets per customer. The asset detail page shows a sidebar listing all of the customer's other managed systems for easy navigation.
What's the difference between RMM and Equipment assets?
RMM assets have the monitoring agent installed and provide real-time status, detailed hardware info, and remote management. Equipment assets are manually tracked records with basic device information.
How do I connect remotely to an asset?
Two options, both working the same way from the asset detail page: with RustDesk configured, use "Install RustDesk" to deploy the client, after which the "RustDesk" button connects directly (the machine's unattended-access password is copied to your clipboard automatically - paste it at the prompt). With ScreenConnect configured, use "Install ScreenConnect" to deploy the access agent, after which the "ScreenConnect" button joins that device's session directly.
What do the status colors mean?
Green (Online) - The RMM agent is currently connected. Red (Offline) - The agent hasn't reported recently. Gray (Unknown) - Status isn't available (typically for equipment assets).
How do I run a script on an asset?
From the RMM asset detail page, click "Run Script", select a script from your library, and click Execute. The script runs on the asset when it next checks in. View results in the Script History tab.
Can I remove the RMM agent from an asset?
Yes, click "Uninstall Agent" on the asset detail page. This sends an uninstall command that fully removes the agent and the RMM Monitor tray app (including its Windows startup entry), so nothing is left behind. Historical data is preserved even after the agent is removed.
How do I change an asset's color?
On the RMM asset detail page, use the Color dropdown in the System Information section. Changes are saved automatically.
