Customers
Manage your customer database with complete contact information, service history, assets, and account balances.
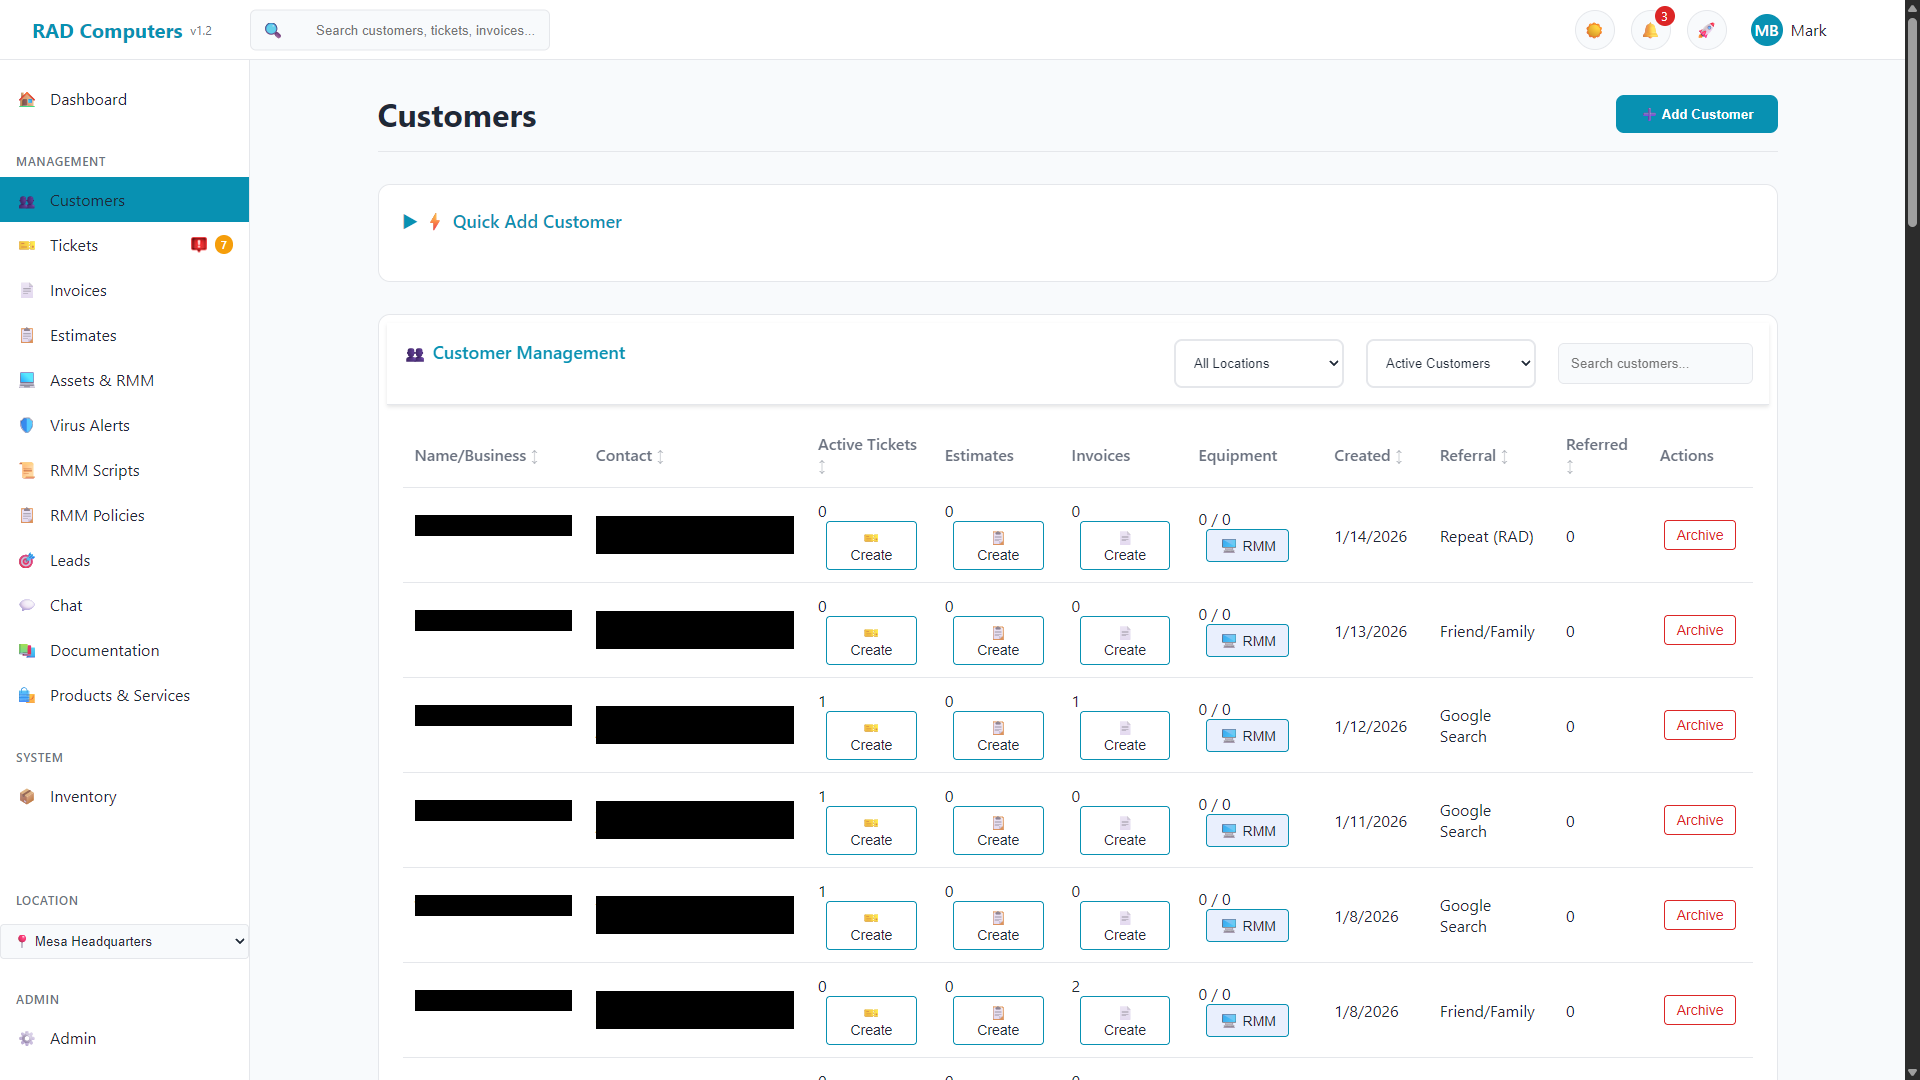
The Customers list view with search and filtering options
Overview
The Customers module is your central hub for managing all customer information. Every ticket, invoice, and asset is linked to a customer record, making it easy to view their complete history with your shop.
Contact Management
Store names, phone numbers, emails, and addresses for each customer.
Service History
View all past tickets, invoices, and estimates for any customer.
Asset Tracking
Track all devices and equipment owned by each customer.
Store Credit
Manage store credit balances, referral rewards, and the payment ledger.
Customer List View
The customer list displays all your customers with quick access to their information. You can search, filter, and sort to find any customer quickly.
Search and Filtering
Use the search bar to find customers by:
- Name - First name, last name, or business name
- Phone Number - Any phone number on file
- Email Address - Customer email
Additional filtering options include:
- Location Filter - Filter customers by location (if multiple locations are configured)
- Archive Status - View Active Customers, All Customers, or Archived Only
List Columns
The customer table displays the following columns. Columns are sortable and can be reordered by dragging and dropping. The table header remains sticky when scrolling.
| Column | Description |
|---|---|
| Name/Business | Customer name with business name displayed below (if applicable) |
| Contact | Email address and phone number |
| Active Tickets | Number of open/active tickets for this customer |
| Estimates | Number of estimates for this customer |
| Invoices | Number of invoices for this customer |
| Equipment | Number of assets/devices registered to this customer |
| Created | Date the customer record was created |
| Referral | How the customer heard about your business |
| Referred | Number of customers this customer has referred |
| Actions | Quick action buttons for the customer |
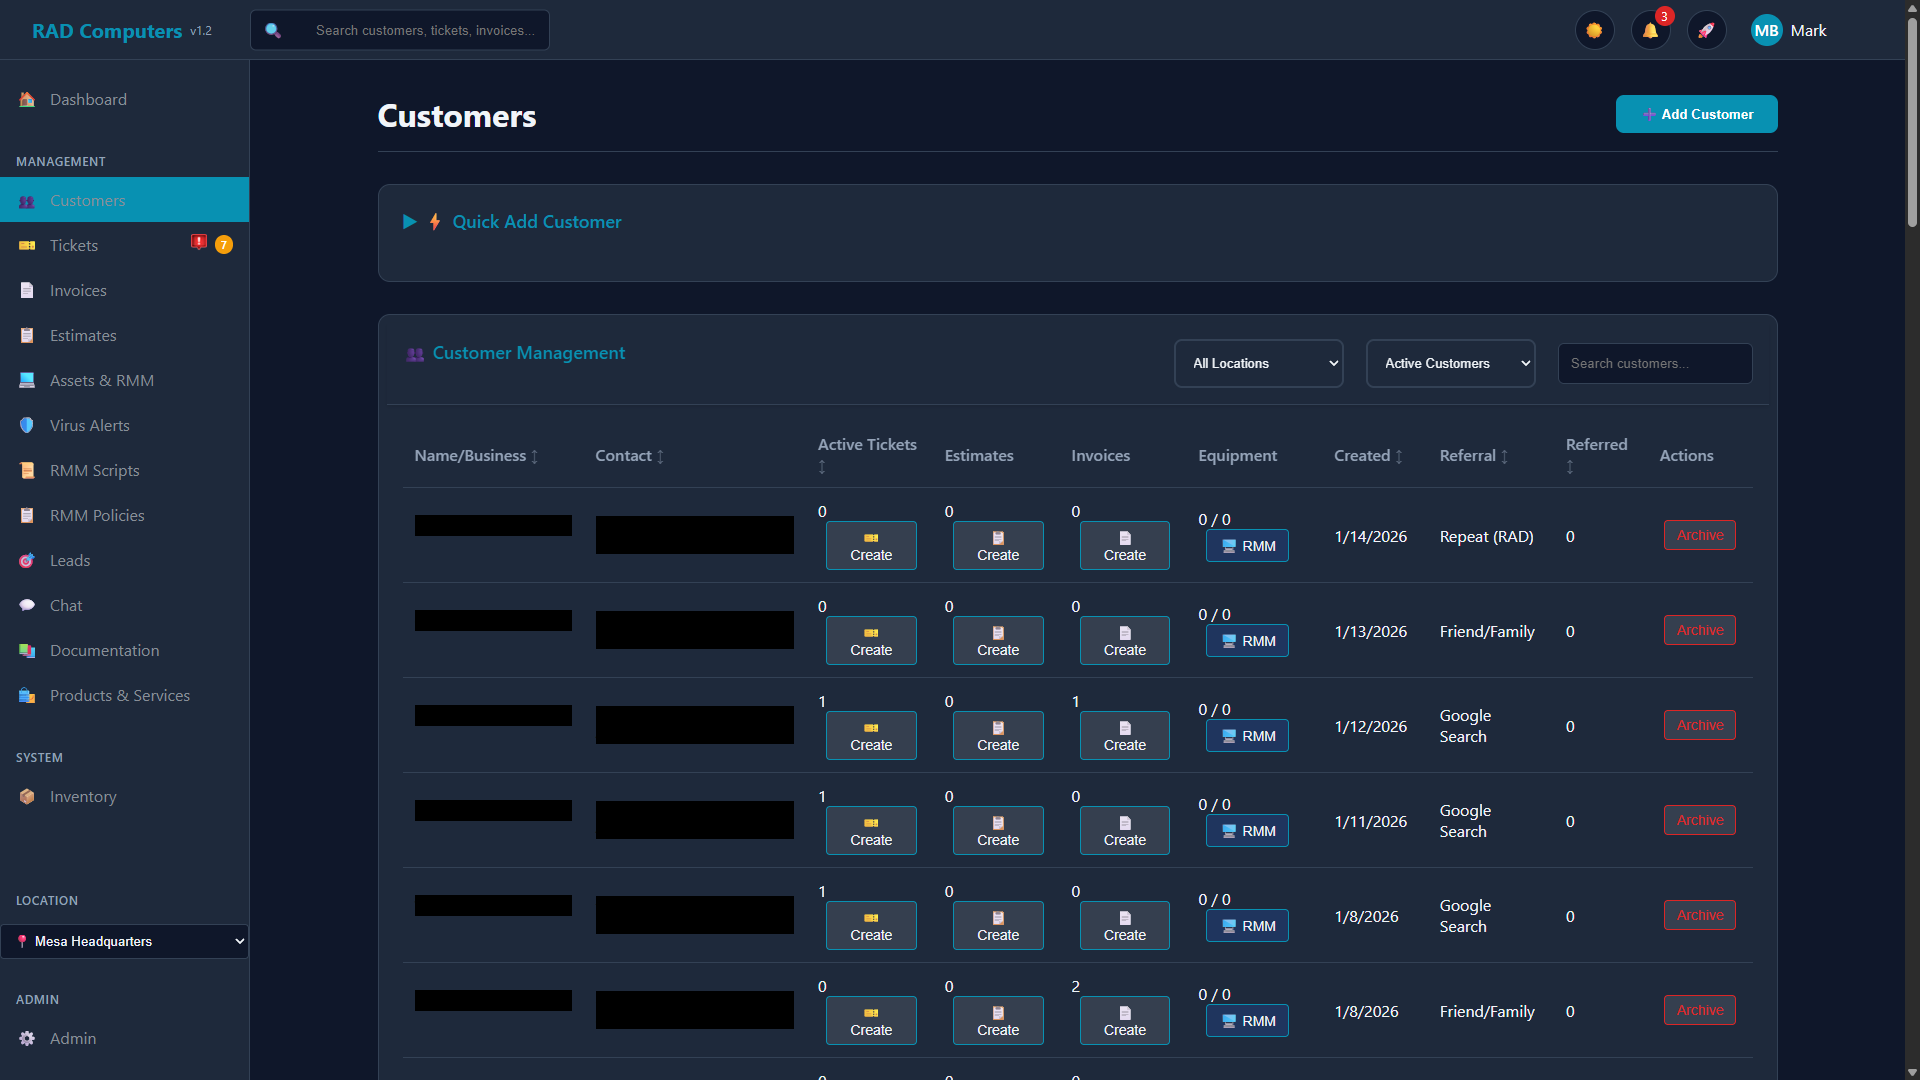
Needs Attention Section
Customers that require attention (such as those with incomplete information) are highlighted in a special "Needs Attention" section at the top of the customer list with a distinctive amber background.
Click any customer row to open their detail modal for viewing and editing. Use the action buttons in the Actions column to quickly create tickets, invoices, or perform other operations for that customer.
Quick Add Customer
A collapsible "Quick Add Customer" form is available at the top of the Customers page for rapidly creating new customer records without leaving the page. This form includes essential fields and options to create a customer, create a customer and immediately start a ticket, or create a customer and immediately start an invoice.
Adding a New Customer
Create customer records when new customers bring in repairs, or add them ahead of time for scheduled appointments.
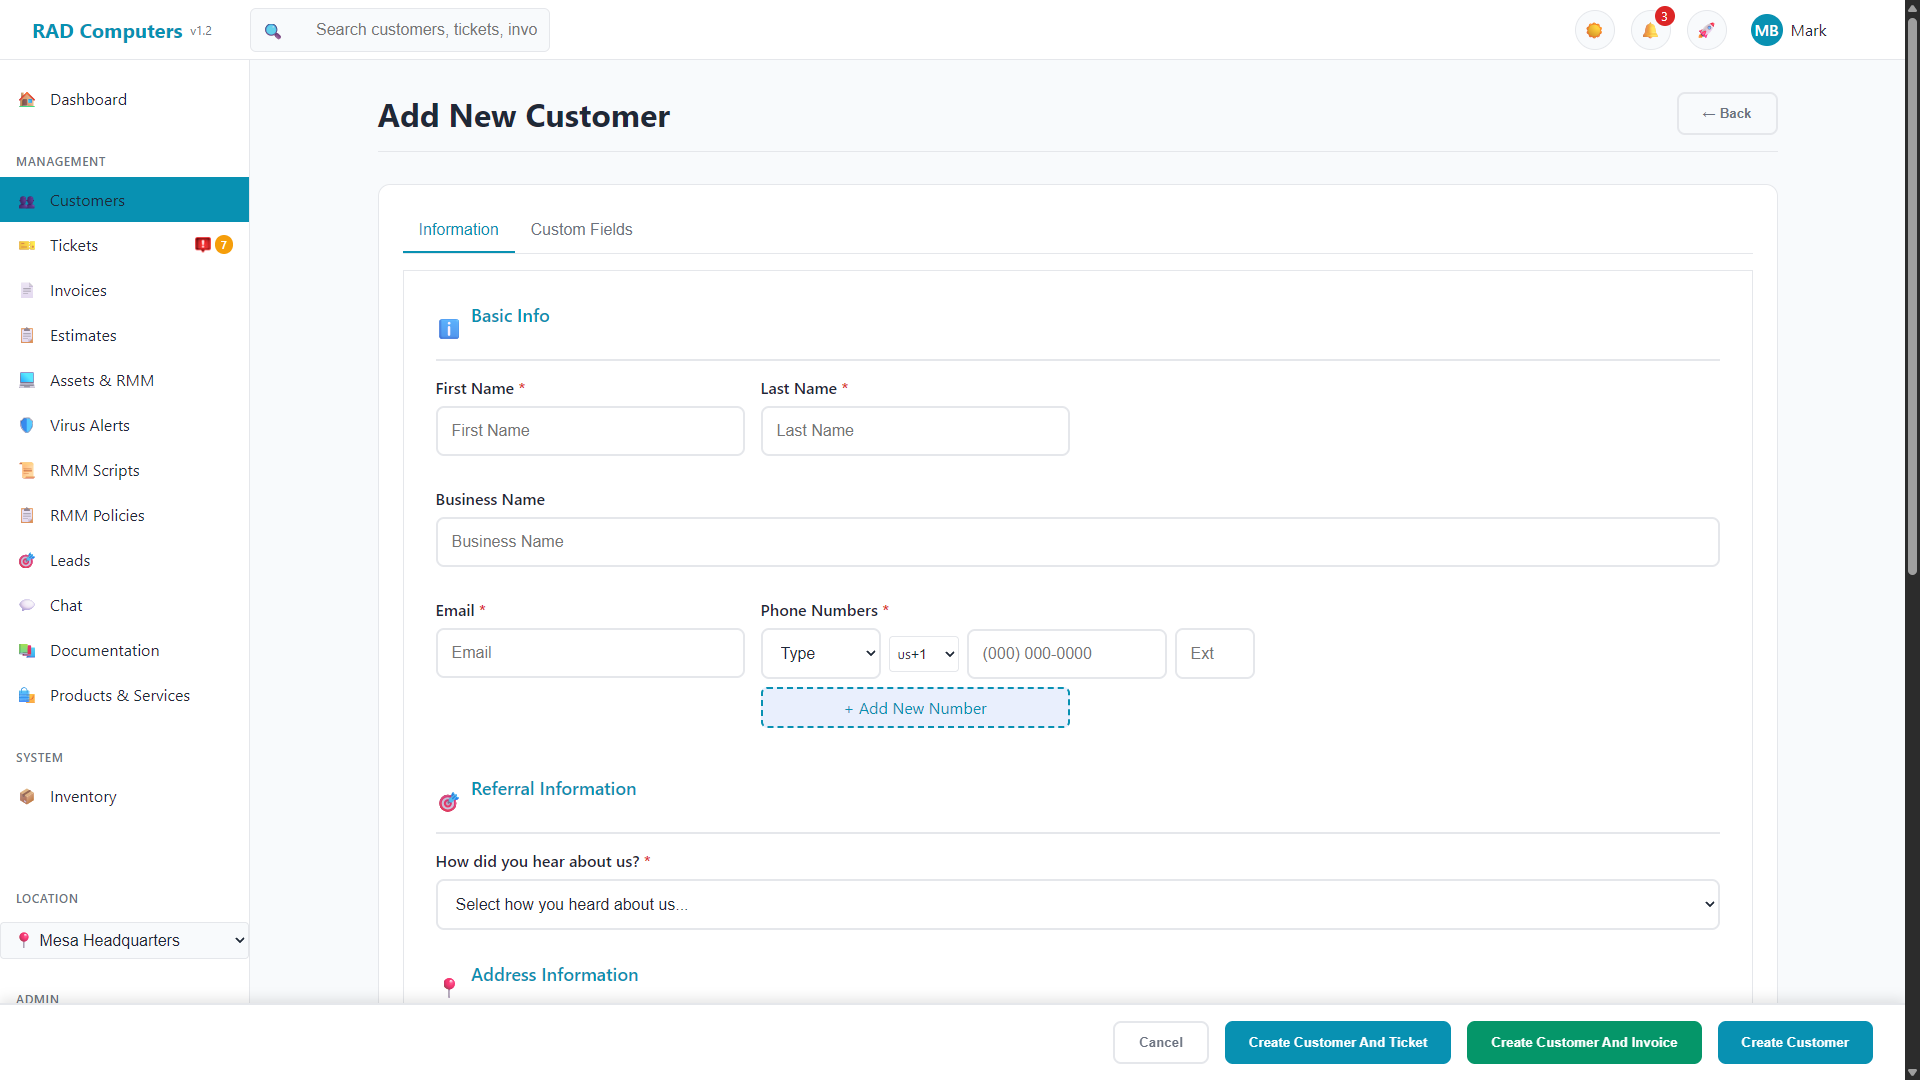

The Add Customer form with all available fields
Step-by-Step: Adding a Customer
Navigate to Customers and click the + Add Customer button, or click + New Customer from any ticket form.
Fill in the required fields (marked with *):
- First Name* - Customer's first name
- Last Name* - Customer's last name
- Email* - Email address for invoices and notifications
- Phone Number* - At least one phone number with type (Mobile, Home, or Work) and optional extension
- Referral Source* - How they found your shop
Complete additional fields as needed:
- Business Name - For commercial customers
- Additional Phone Numbers - Click "+ Add New Number" to add more phone numbers with type and extension
- Address - Street Address, City, State/Country, ZIP/Postal Code, Gate Code
- Notes - Internal notes about the customer
Click Save Customer to create the record. The customer is now available for tickets, invoices, and estimates.
Required Fields Summary
| Field | Required | Notes |
|---|---|---|
| First Name | Yes | Customer's given name |
| Last Name | Yes | Customer's family name |
| Yes | Used for invoices and notifications | |
| Phone | Yes | At least one phone number required with type (Mobile/Home/Work) |
| Referral Source | Yes | How the customer heard about your business |
| Business Name | No | For commercial accounts |
| Address | No | Street, City, State, ZIP, Gate Code |
Customer Detail View
Click any customer to open their detail modal, which shows all information organized into tabs.
Modal Tabs
The customer detail modal is organized into the following tabs:
- Information - Basic contact info, referral information, address, customer settings, and the Store Credit section
- Tickets - All repair tickets for this customer
- Projects - Projects linked to this customer
- Invoices - All invoices for this customer
- Estimates - All estimates for this customer
- Contacts - Additional contact persons associated with this customer
- Custom Fields - Custom fields configured for your organization
- Assets - Devices and equipment registered to this customer, organized into folders
- Payments - The customer's payment history ledger
- Credentials - Stored login credentials and passwords, saved encrypted, with active and archived lists
- Documentation - Notes and documentation for this customer
Information Tab
The Information tab contains:
- Basic Info - First name, last name, business name, email, phone numbers with types and extensions
- Referral Information - How the customer found your business, with options like Google, Facebook, Friend/Family, Previous Customer, Advertisement, Yelp, Walk-in, or Other
- Address Information - Street address, address line 2, city, state/country, ZIP/postal code, gate code
- Customer Settings - Tax rate, tax free status, portal user, SMS service, billing emails, marketing emails, ticket notifications
- Additional Notes - Internal notes about the customer
RMM Installer
From the customer view, you can generate RMM (Remote Monitoring and Management) installers to enroll the customer's devices in monitoring. A modal lets you pick a maintenance plan, choose where new devices land in the customer's asset folder tree, and answer the customer's optional cloud backup question (opt-in applies only to devices enrolled with that installer). RAD Repairs then produces a customer-bound installer download or a PowerShell deployment script. See the RMM & Monitoring documentation for details.
The modal footer provides buttons to Edit the customer, Save changes, Archive the customer, and close the modal. When in edit mode, all fields become editable and you can add additional phone numbers.
Contacts Tab
The Contacts tab lets you add extra contact people to a customer — for example a billing contact, an office manager, or a second decision-maker — each with their own name, email, phone, and mobile. The customer record itself remains the primary contact; these are additional people.
Each contact can be notified alongside the primary customer. In the contact form, turn on any of the following (a separate copy is sent to that contact):
- Ticket emails - status updates and other ticket notifications
- Ticket SMS - text notifications on ticket updates
- Invoice emails & receipts - invoices sent and payment receipts
- Invoice & payment SMS - text notifications for invoices and payments
Email options require an email address on the contact; SMS options require a mobile or phone number. A contact's opt-ins are independent of the primary customer's preferences — so you can, for example, text a billing contact about invoices even if the main customer has SMS turned off.
Texting invoices and receipts is off by default. An administrator enables it in Twilio SMS settings (App Center) before those text notifications are sent to anyone.
Customer Assets Tracking
Keep track of all devices and equipment owned by each customer. When a customer brings in a device, it can be added to their asset list for future reference.
Asset Information Stored
- Device Name / Friendly Name - What you and the customer call the machine
- Make/Brand and Model - Manufacturer (Dell, HP, Apple, etc.) and model
- Color and Serial Number - For identification at check-in and pickup
- Operating System and Device Password - So technicians can get in without asking twice
- Purchase Date and Warranty Expiry - For warranty tracking
- Notes - Specs, configurations, special instructions
Asset Folders and Policies
The customer's Assets tab organizes devices into a folder tree. You can create folders (for example "Front Office" and "Warehouse"), move assets between them, and assign RMM policies at the customer or folder level - assets inherit the policy of their containing folder unless they have their own.
Benefits of Asset Tracking
- Quickly select existing assets when creating tickets
- View complete service history per device
- Track warranty status and purchase dates
- Store device-specific notes and configurations
- Enable RMM monitoring on managed devices
Learn more about asset management in the Assets documentation.
Store Credit
Every customer has a store credit balance that can be applied to their invoices. Credit can come from several sources:
Credit Sources
| Source | Description |
|---|---|
| Manual Addition | Credit added by staff for any reason (goodwill, promotions, prepayment) |
| Refund | When refunding an invoice you can choose to issue the refund as store credit instead of returning money |
| Adjustment | Corrections to the balance |
| Referral Credit | Automatic reward added when a new customer names this customer as their referrer (when referral credits are enabled in Admin Settings; a thank-you email is sent and credits can be set to expire) |
Managing Credits
In the Store Credit section of the customer's Information tab, click + Add Credit, enter the amount, pick the type (Manual Addition, Refund, or Adjustment), and optionally add a description.
When recording a payment on an invoice, the customer's available store credit is shown and can be used as the payment method. Recurring invoices can also be set to apply store credit automatically each cycle.
The collapsible credit transaction history under the Store Credit section shows every addition and usage with dates and descriptions. The Payments tab shows the customer's full payment ledger, where refunds appear as their own "refund" entries.
Communication Preferences
Customer communication preferences are managed with the toggle switches in the Customer Settings section of the customer detail modal. Open a customer and scroll to Customer Settings to change them.
Available Preferences
Verbal Opt-In Workflow
Due to regulatory requirements under the Telephone Consumer Protection Act (TCPA) and U.S. carrier messaging policies, prior express consent is required before sending SMS messages.
RAD Repairs provides SMS functionality to business tenants. We do not contact end users directly.
During account setup or customer onboarding, the tenant enables communication preferences, including:
- Enable Portal User - Allow the customer to access the customer portal
- SMS Service Enabled - Receive text message updates (if SMS is configured)
- Receive Billing Emails - Receive billing-related email notifications
- Marketing Emails - Opt-in for promotional communications
- Ticket Email Notifications - Receive email updates about ticket status changes
If SMS Service Enabled is selected, the tenant must obtain verbal consent before sending SMS messages using the following script:
“By providing your phone number, you agree to receive text messages from [Business Name] regarding service updates and account notifications. Message frequency varies. Message and data rates may apply. Reply STOP to unsubscribe or HELP for assistance.”
The customer must verbally agree before SMS messaging begins. Consent is documented in the tenant’s CRM and retained for compliance purposes. Our platform enforces automatic STOP and HELP keyword handling. Messaging is transactional in nature. No purchased lists or cold messaging are permitted.
Always respect customer opt-out preferences. Marketing communications should only be sent to customers who have explicitly opted in.
Importing Customers from Another System
If you are switching from another repair shop platform, RAD Repairs can import your existing customers (along with tickets, estimates, and invoices) from:
- Syncro MSP - Enter your Syncro subdomain and API token to run a one-time import. You can also enable ongoing sync to push new records to Syncro during your transition
- RepairDesk - Enter your RepairDesk API key to import your data
Both imports are available during the Welcome Wizard on first login, and later from the App Center. Imports can be re-run safely - existing records are matched rather than duplicated.
Frequently Asked Questions
Can I merge duplicate customer records?
There is no customer merge feature. If you end up with a duplicate, move any active work to the record you want to keep, then archive the duplicate so it no longer appears in the active customer list. (Duplicate tickets can be merged from the ticket view.)
How do I remove a customer?
From the customer detail modal, click the Archive button in the footer. Archiving hides the customer from the active list while preserving their tickets, invoices, and history. Use the Archive Status filter to view archived customers and restore them if needed.
Can customers see their own information?
If the customer portal is enabled for a customer (via the "Enable Portal User" setting), they can log in with a magic link sent to their email and view their tickets, invoices, estimates, and assets - and pay invoices online.
How do referral credits work?
The system tracks referral sources for each customer. The "Referred" column in the customer list shows how many other customers each customer has referred. When referral credits are enabled in Admin Settings, a customer automatically earns store credit when a new customer names them as their referrer - this works whether the new customer is added with the full form or the Quick Add form. A thank-you email is sent, and you can set credits to expire after a number of days.
Can I add custom fields to customer records?
Yes. The customer detail modal includes a "Custom Fields" tab where custom fields are displayed. Custom fields can be configured in Admin Settings. Access to manage custom fields requires administrator permissions.
How do I archive a customer?
Customers can be archived rather than deleted. Use the Archive Status filter dropdown to toggle between viewing Active Customers, All Customers, or Archived Only.
How do I deploy RMM agents to customer devices?
Open the RMM Installer modal from the customer view. Pick a maintenance plan, choose the destination asset folder, and answer the customer's optional cloud backup choice. You then get a customer-bound installer (EXE) or a PowerShell mass-deployment script for the customer's devices. See the RMM & Monitoring documentation for the full walkthrough.
Related Documentation
Need Help?
Have questions about customer management? Our support team is ready to assist.
Contact Support