Location Management
Manage multiple shop locations, each with its own address, phone number, timezone, and notification schedule. Locations also drive your subscription billing - your first location is included, and each additional location adds $100.00 per month.
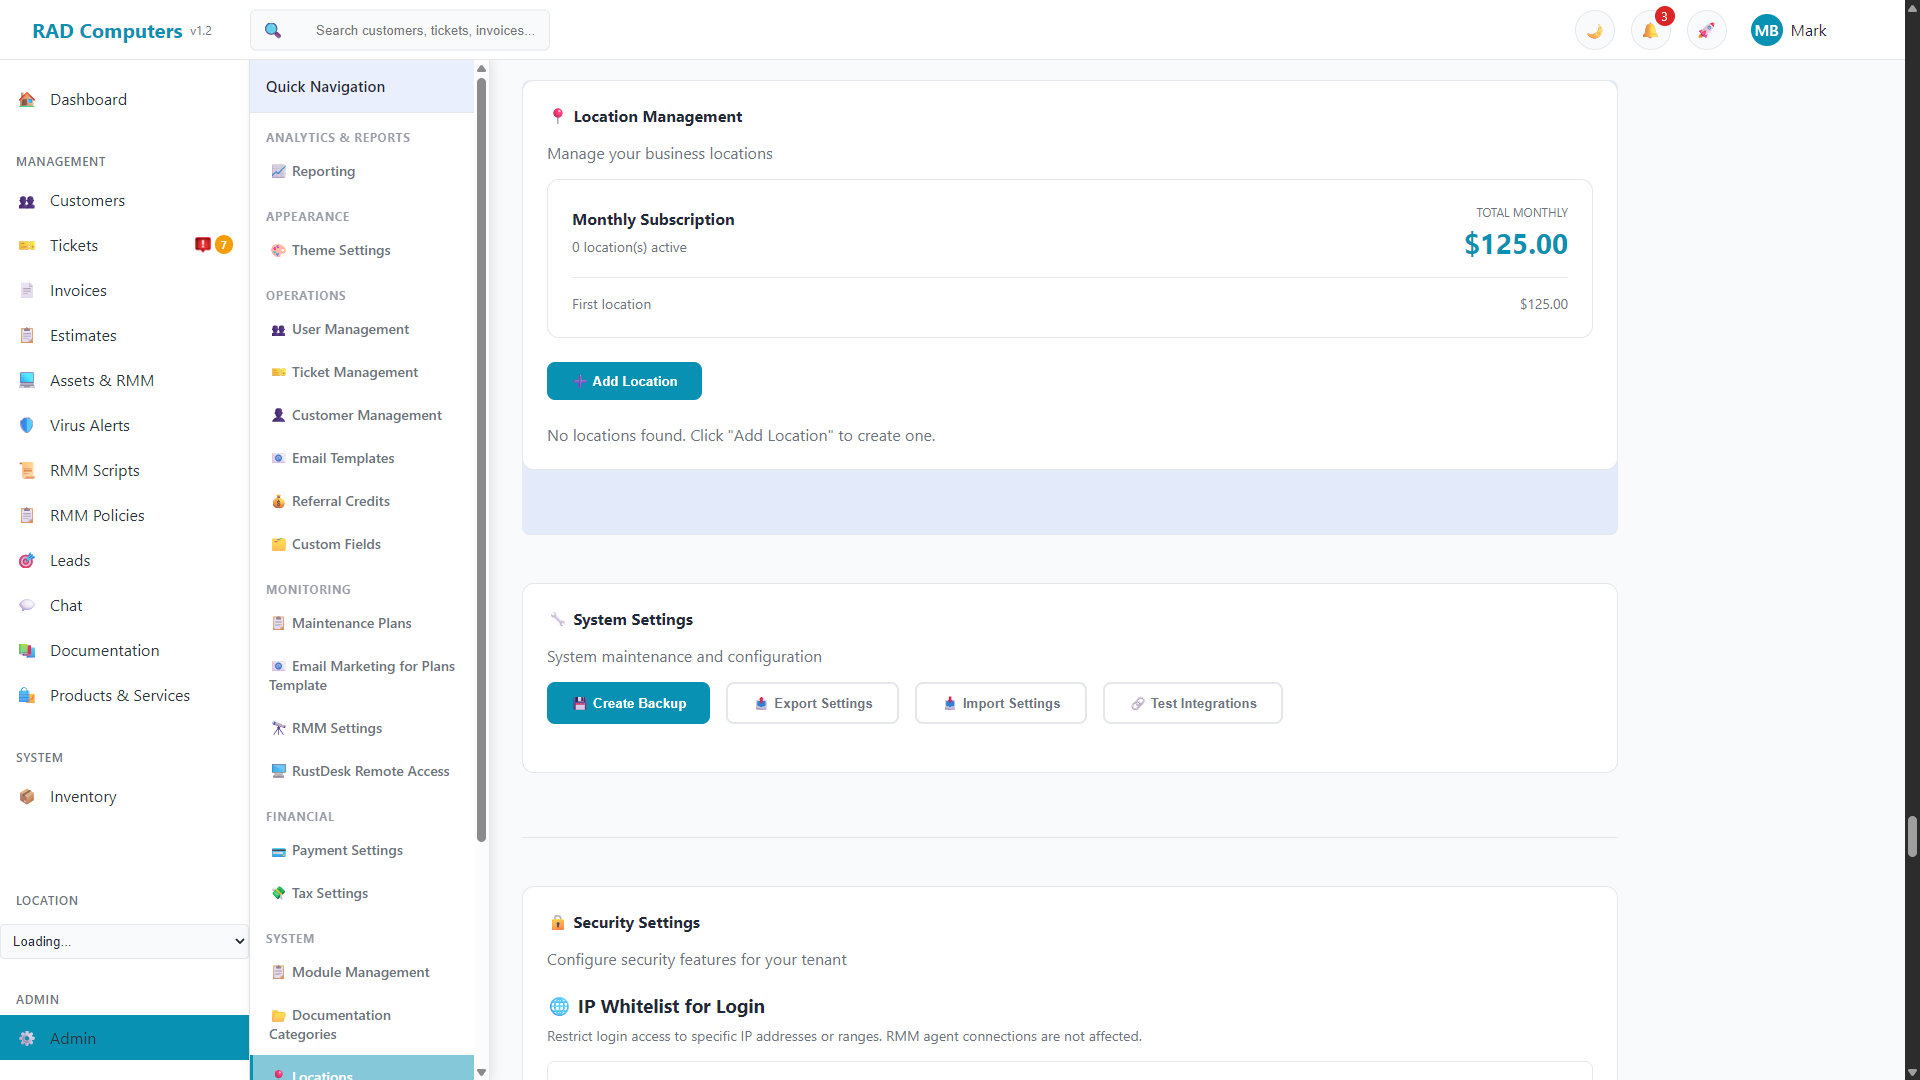

The Location Management interface showing all configured shop locations
Overview of Multi-Location Support
RAD Repairs supports businesses with multiple physical locations. The Location Management section in Admin Settings lets you:
- Manage all locations in one place - Each location is shown as a card with its details, an Active/Inactive badge, and Edit/Delete buttons
- See your subscription cost at a glance - A billing summary at the top shows your active location count and total monthly subscription
- Assign users to locations - Every user is assigned to one or more locations from User Management
- Switch locations from the sidebar - A location selector in the main sidebar lets users switch which location they are working in
- Schedule notifications per timezone - Each location has its own timezone and daily notification send time
- Set tax rates per location - Each location has its own state and city tax rates, configured in Tax Settings while that location is selected
- Compare performance - The Location Comparison report shows revenue, tickets, resolution rate, customers, and inventory per location
Location Billing: Your first location is included in the base subscription ($125.00/month). Each additional location adds $100.00/month. The billing summary at the top of the Location Management section always shows your current total.
Adding a New Location
To add a new shop location to your RAD Repairs account:
Navigate to Locations
Go to Admin Settings and click on Locations in the settings menu.
Click Add Location
Click the "Add Location" button above the locations list.
Accept the Additional Location Agreement
If this is not your first location, an agreement window explains that your monthly subscription will increase by $100.00, applied to your next billing cycle. Check the agreement box and click "I Agree & Continue".
Enter Location Details
Fill in the location name (required) plus the address, city, state, ZIP code, and phone number. Choose the location's Timezone and Notification Send Time, and leave Active checked.
Save Location
Click "Save Location" to create the new location. It will immediately be available for selection throughout the system.
Location Details
Each location stores the following information:
Location Name
A descriptive name for the location that helps identify it within the system. This could be a branch name (e.g., "Downtown Store"), city name (e.g., "Main Office"), or any identifier that makes sense for your business. This is the only required field.
Address
The physical address of the location:
- Street Address
- City
- State
- ZIP Code
Phone Number
The primary contact phone number for this location.
Timezone
The location's timezone (Eastern, Central, Mountain, Arizona, Pacific, Alaska, or Hawaii). This controls when the location's scheduled notifications go out.
Notification Send Time
The hour of the day (8:00 AM through 8:00 PM) when automated daily notifications - such as worksheet status emails and SMS messages - are sent to customers of this location, in the location's own timezone. This lets a multi-timezone business send notifications at a sensible local hour everywhere.
Active
Whether the location is currently in use. Each location card shows an Active or Inactive badge. Inactive locations are skipped when scheduled notifications run.
Location Billing
The billing summary at the top of the Location Management section shows:
- The number of active locations on your account
- Your first location at $125.00/month (the base subscription)
- Each additional location at $100.00/month
- Your total monthly subscription cost
Adding a location requires accepting the Additional Location Agreement, and the fee applies from your next billing cycle. Deleting a location reduces your subscription by $100.00 on the next billing cycle. You may add or remove locations at any time; every location includes all standard features.
Note: You cannot delete your last remaining location - the Delete button is disabled when only one location exists.
Assigning Users to Locations
Every user is assigned to at least one location. When creating a user, you pick a single location; when editing a user, you can check multiple locations under Location Assignments. Users switch between their locations with the location selector in the main sidebar - the app remembers each user's current location and filters their view accordingly.
Go to User Management
Navigate to Admin Settings > User Management.
Edit User
Click Edit on the user you want to assign to location(s).
Select Locations
In the Location Assignments section, check one or more locations this user can access.
Save Changes
Click Save to apply the location assignments.
Location-Based Reporting
The Location Comparison report (in Admin Settings > Reporting) compares your locations side by side over a selected period, including:
- Revenue - Total revenue per location
- Tickets - Ticket volume per location
- Resolution Rate - How efficiently each location closes tickets
- Customers - Customer counts per location
- Inventory - Inventory per location
Frequently Asked Questions
How much does an additional location cost?
Each location after your first adds $100.00/month to your subscription. You will be asked to accept the Additional Location Agreement before the location is created, and the fee applies to your next billing cycle.
How do I remove a location?
Click Delete on the location's card in Admin Settings > Locations and confirm. Your monthly subscription is reduced by $100.00 on the next billing cycle. You cannot delete your only remaining location.
What does the Notification Send Time control?
It sets the hour (in the location's own timezone) when automated daily customer notifications, such as worksheet status emails and SMS messages, are sent for that location.
Can a user work at multiple locations?
Yes. Edit the user in User Management and check every location they should have access to under Location Assignments. They can then switch locations from the sidebar selector.
What happens if I mark a location Inactive?
The location stays on your account but shows an Inactive badge, and scheduled notifications are no longer sent for it. Uncheck Active in the location's edit form to deactivate it.
How many locations can I add?
There is no fixed limit - add as many locations as your business needs. Each additional location is billed at $100.00/month.
Need Help Setting Up Locations?
If you need assistance configuring multiple locations or have questions about multi-location features, our support team is ready to help.
Contact Support