Theme Settings
Customize the visual appearance of your RAD Repairs installation to match your brand identity. Configure colors, upload your logo, set a custom favicon, and choose your preferred display mode.
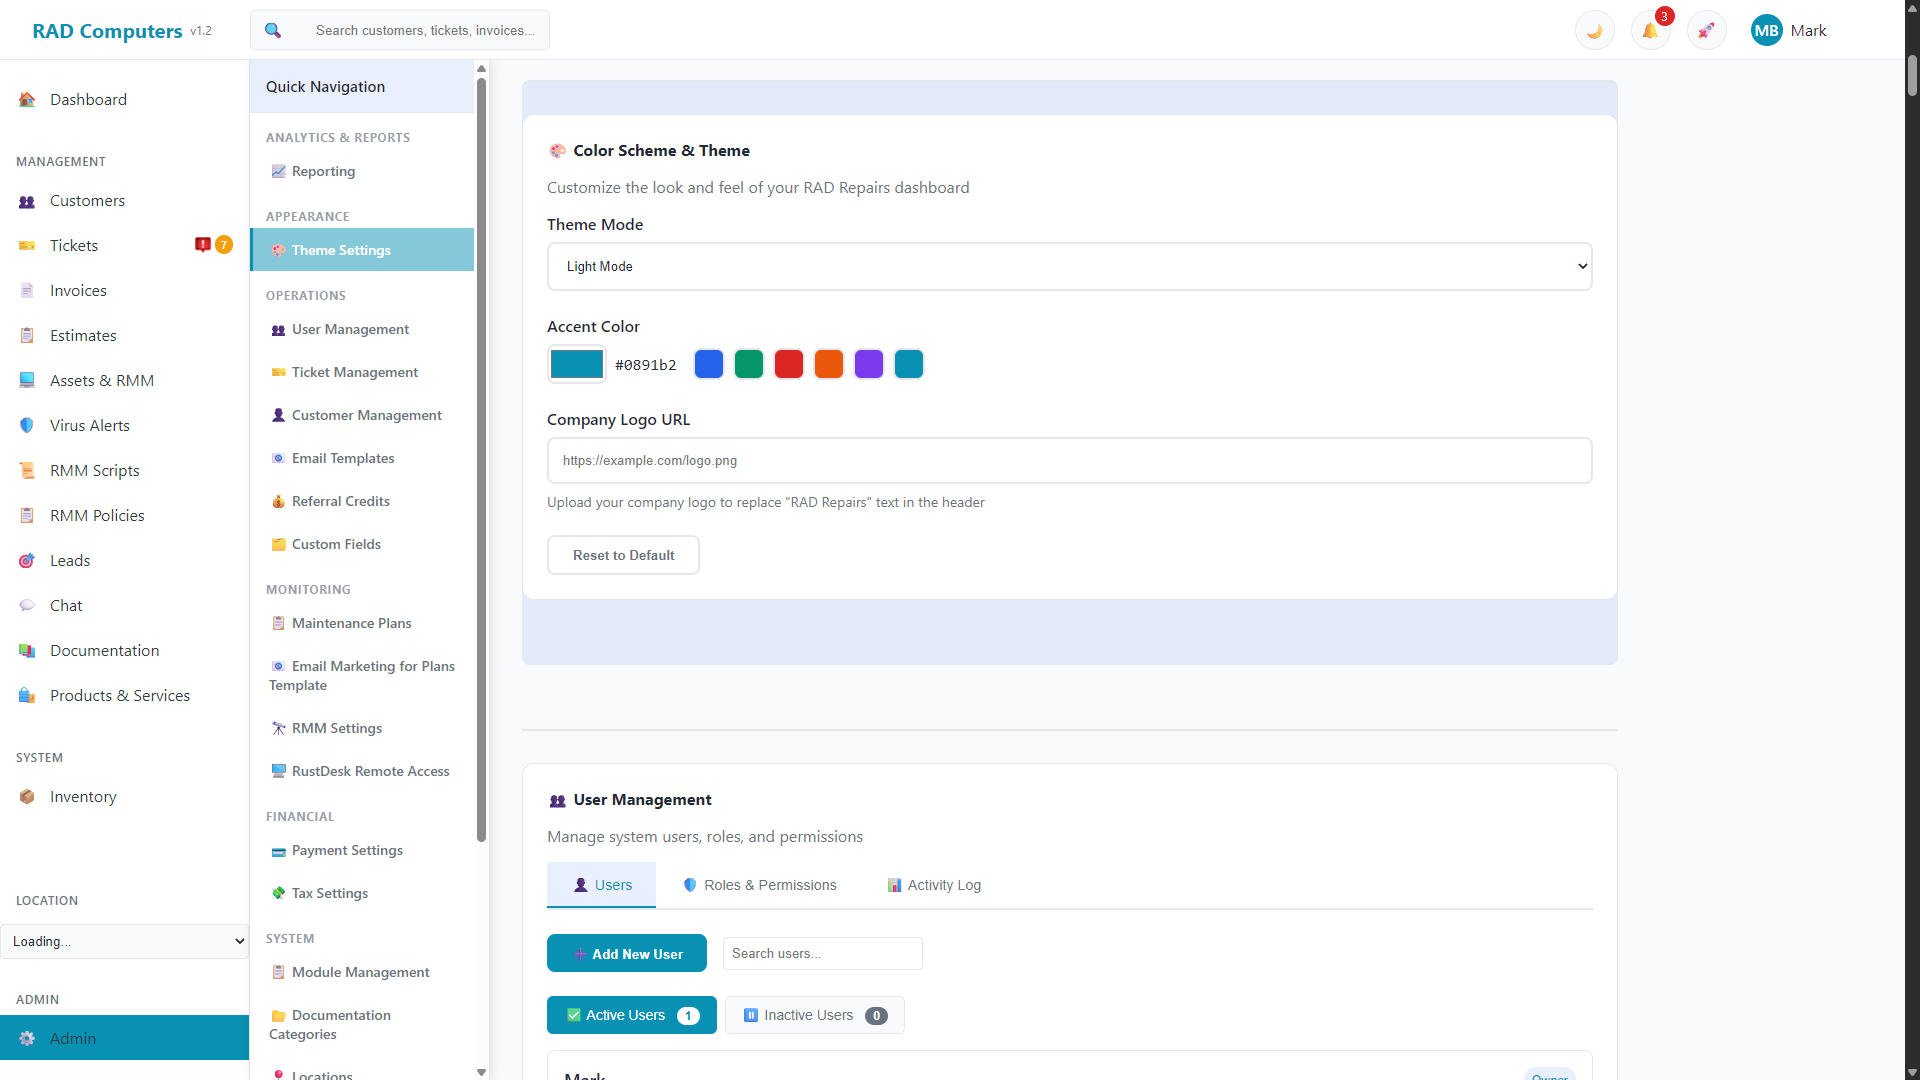
The Theme Settings panel allows you to customize your brand appearance across the entire application
Overview
The Theme Settings page allows you to personalize your RAD Repairs installation to reflect your company's brand. Changes made here apply across the entire application, including:
- The sidebar and navigation elements
- Buttons, links, and accent colors
- Printed documents such as invoices, estimates, and receipts
- Customer-facing portals and communications
- The browser tab icon (favicon)
Tip: Theme changes are applied immediately after saving. Use the preview feature to see how your changes will look before committing them.
Primary Color Selection
The primary color is used throughout the application for buttons, links, highlights, and accent elements. Choose a color that represents your brand.
Open Color Picker
Click on the color swatch next to "Primary Color" to open the color picker tool.
Select Your Color
Use the color picker to select your desired color, or enter a specific hex code (e.g., #3B82F6) for precise brand matching.
Preview Changes
The preview panel will update in real-time to show how your selected color will appear across various UI elements.
Accessibility Note: When selecting a primary color, ensure it provides sufficient contrast against white text. Very light colors may make text difficult to read.
Logo Upload and Configuration
Upload your company logo to display in the application header, printed documents, and customer communications.
Supported Formats
- PNG - Recommended for logos with transparency
- JPG/JPEG - Suitable for photographic logos
- SVG - Vector format for crisp display at any size
- GIF - Supported but not recommended
Requirements
- File Size: Maximum 2MB
- Recommended Width: At least 200px for best quality
Upload Steps
Upload Logo
Click the logo upload area or drag and drop your logo file. The preview will update immediately.
Review Preview
Check the preview to ensure your logo looks correct. Logos are automatically scaled to fit.
Done
Your logo is saved automatically and will appear in the header and on printed documents (invoices, estimates, tickets, reports).
Recommended Dimensions: For best results, use a logo that is at least 200px wide. Higher resolution images will appear sharper on high-DPI displays and in printed documents.
Welcome Wizard: You can also upload your logo during the initial setup process in the Welcome Wizard (Step 2: Business Information).
Favicon Settings
The favicon is the small icon that appears in browser tabs and bookmarks. A custom favicon helps reinforce your brand identity.
Favicon Requirements
- Format: PNG or ICO recommended
- Size: 32x32 to 512x512 pixels (larger sizes provide better quality on high-resolution displays)
- File Size: Maximum 500KB
- Shape: Square images work best
Upload Favicon
Click or drag-and-drop your icon file into the favicon upload area. The preview will update immediately.
Preview
The preview shows how your favicon will appear in browser tabs. Ensure it is recognizable at small sizes.
Welcome Wizard: You can also upload your favicon during the initial setup process in the Welcome Wizard (Step 2: Business Information).
Dark Mode Default Setting
RAD Repairs supports both light and dark display modes. You can configure the default mode for your installation.
Available Options
- Light Mode - Traditional light background with dark text
- Dark Mode - Dark background with light text, easier on the eyes in low-light environments
- System Default - Automatically matches the user's operating system preference
User Override: Individual users can always toggle between light and dark mode using the theme button in the application header, regardless of the default setting.
Preview Changes Before Saving
The Theme Settings page includes a live preview feature that allows you to see how your changes will look before applying them.
Using the Preview Panel
- Real-time Updates - The preview panel updates automatically as you make changes
- Multiple Views - Switch between sidebar, button, and document previews
- Light/Dark Toggle - Preview your theme in both light and dark modes
- Reset Option - Click "Reset to Defaults" to restore the original theme settings
Make Your Changes
Adjust colors, upload logos, and configure settings. The preview updates in real-time.
Review Preview
Examine the preview panel to ensure your changes look correct in different contexts.
Save or Discard
Click "Save Changes" to apply your theme, or "Cancel" to discard changes and revert to the current settings.
Frequently Asked Questions
How long does it take for theme changes to apply?
Theme changes are applied immediately after saving. All users will see the new theme on their next page load or refresh. Some browsers may cache the old styles briefly, but a hard refresh (Ctrl+F5 or Cmd+Shift+R) will load the new theme immediately.
Can I use different themes for different locations?
Currently, theme settings apply globally across your entire RAD Repairs installation. All locations share the same visual theme. Multi-theme support for different locations may be added in a future update.
What happens to my logo if I change the primary color?
Your uploaded logo remains unchanged when you modify the primary color. The primary color only affects UI elements like buttons, links, and accents - not your uploaded logo images.
How do I remove my custom logo and use the default?
Click the "Remove Logo" button (trash icon) next to your uploaded logo. This will revert to displaying your company name in text format in the header.
Why does my logo look blurry?
Blurry logos are typically caused by uploading an image that is too small. For best results, upload a logo that is at least 200px wide. SVG format is recommended for crisp display at any size.
Can users choose their own theme colors?
Users can toggle between light and dark mode, but the primary brand color is set by administrators and applies to all users. This ensures consistent branding across your organization.
Will theme changes affect printed documents?
Yes, the primary color and logo are used on printed documents including invoices, estimates, and receipts. The preview panel includes a document preview to show how printed materials will appear.
Need Help with Theme Customization?
If you need assistance with branding or have questions about theme options, our support team is here to help.
Contact Support